hello shaders
Write your first animated shaders with p5.js and WebGL2.
Shaders have quietly become part of the modern web. They're used everywhere: animated backgrounds, fancy buttons, particle systems, image effects, and entire interactive experiences.
I've played with shaders a few times before, but always stopped before really understanding them. This time I'm starting from scratch and documenting everything I learn.
To keep things simple, I'm using p5.js. It hides a lot of the WebGL boilerplate so we can spend more time experimenting with the interesting part: the math.
GLSL stands for OpenGL Shading Language.
glsl for open gl shader language
Setting up p5
You can follow along using the p5 online editor or simply include the library:
<link rel="stylesheet" href="/demo/reset.css">
<script src="https://cdn.jsdelivr.net/npm/p5@2.3.0/lib/p5.min.js"></script>
Let's make sure everything works before touching shaders.
function setup() {
  // Create a drawing canvas 400 pixels wide and 400 pixels high
  createCanvas(400, 400);
}

function draw() {
  // Set the background color to a light gray
  background(123);

  // Customize the text
  textSize(32);
  textAlign(CENTER, CENTER);
  fill(0); // Black text

  // Display the text at the center of the canvas
  text("Hello World 👋", width / 2, height / 2);
}
If you see Hello World, we're ready.
The two shaders
Every shader program is made of two small programs running directly on the GPU.
- Vertex Shader: decides where geometry exists.
- Fragment Shader: decides the color of every pixel.
Think of the pipeline like this:
flowchart TD
    CPU[CPU]
    VS[Vertex Shader]
    FS[Fragment Shader]
    Screen[Screen]

    CPU --> VS
    VS --> FS
    FS --> Screen
For simple 2D rendering, the vertex shader is almost boring.
Its only real job is assigning a value to the built-in variable gl_Position.
attribute vec3 aPosition;
void main(){
  gl_Position = vec4(aPosition, 1.0);
}
aPosition comes from p5.js.
gl_Position tells the GPU where this vertex should appear.
The fragment shader is much more interesting.
It runs once for every pixel that ends up on the screen.
Here we're simply outputting a changing color.
precision mediump float;
uniform float uTime;
void main(){
  gl_FragColor = vec4(abs(sin(uTime)), 0.4, 0.7, 1.0);
}
vec4 represents: red, Green, Blue, Alpha. Each value normally ranges from 0.0 to 1.0.
Running the shader
Now we load both files into p5.
async function setup(){
  createCanvas(300,300, WEBGL)
    myShader = await loadShader("shader.vert", "shader.frag")
}

function draw(){
  shader(myShader)
  myShader.setUniform('uTime', millis()/2000.0)
  rect(-width/2, -height/2, width,height)
}
setUniform() sends data from JavaScript to the GPU.
In this example we're sending elapsed time every frame, allowing the fragment shader to animate.
WebGL2 and the new GLSL syntax
Most tutorials you'll find online use the older GLSL syntax.
Modern browsers support WebGL2, which uses OpenGL ES 3.0.
That means we get a cleaner shader syntax.
The first line of both shader files must be:
#version 300 es
The vertex shader becomes:
#version 300 es
precision mediump float;

in vec3 aPosition;
out vec2 vPos;

void main(){
  vPos = aPosition.xy;
  gl_Position = vec4(aPosition, 1.0);
}
Notice the new keywords.
| Old | New |
|---|---|
| attribute | in |
| varying | out / in |
| gl_FragColor | custom output variable |
The fragment shader also changes.
#version 300 es
precision mediump float;

in vec2 vPos;
out vec4 fragColor;

void main(){
 fragColor = vec4(0.9, .0, 0.3, 1.0);
}
Instead of writing to gl_FragColor, we create our own output variable.
Passing data between shaders
One of the most important concepts is that the vertex shader can send data to the fragment shader
flowchart TD
    CPU["CPU / JavaScript"]

    VS["Vertex Shader"]
    FS["Fragment Shader"]

    CPU -.->|uniforms| VS
    CPU -.->|uniforms| FS

    VS -->|out → in| FS
uniform values come directly from JavaScript.
out values are generated by the vertex shader and automatically interpolated for every pixel.
async function setup(){
  createCanvas(300,300, WEBGL)
    myShader = await loadShader("shader.vert", "shader.frag")
}

function draw(){
  shader(myShader)
  rect(-width/2, -height/2, width,height)
}
Coordinates are different
One thing that need to warp head arround for a secound is:
WebGL doesn't use pixel coordinates.
Instead, the visible world goes from -1 to 1.
(-1,1)      (1,1)

     (0,0)

(-1,-1)    (1,-1)
p5 gives us values between 0 and 1, so we convert them ourselves.
#version 300 es
precision mediump float;

in vec3 aPosition;
out vec2 vPos;

void main(){
  vPos = aPosition.xy;
  vec4 position = vec4(aPosition, 1.0);
  position.xy = position.xy * 2.0 - 1.0;
  gl_Position = position;
}
Using position as color
Now that every fragment receives its position, we can visualize it.
Red increases as we move across the X axis.
- fragColor = vec4(0.9, .0, 0.3, 1.0);
+ fragColor = vec4(vPos.x, .0, 0.3, 1.0);
Or use both coordinates:
- fragColor = vec4(0.9, .0, 0.3, 1.0);
+ fragColor = vec4(vPos.y, vPos.x, 0.3, 1.0);
Without writing any complicated math we've already created a smooth gradient.
That's because the GPU automatically interpolates values between vertices.
Making it move
Static gradients are nice. Shaders become much more fun once time enters the picture. We already send a uniform every frame:
async function setup(){
  createCanvas(300,300, WEBGL)
    myShader = await loadShader("shader.vert", "shader.frag")
}

function draw(){
  shader(myShader)
  myShader.setUniform('uTime', millis() / 2000 )
  rect(-width/2, -height/2, width,height)
}
now in frag we grab that data by declere uniform and fragment shader can animate using sin().
#version 300 es
precision mediump float;

in vec2 vPos;
out vec4 fragColor;
uniform float uTime;

void main(){
 float x = sin(vPos.x + uTime); // cupped it between -1 to 1
 float y = sin(vPos.y + uTime); // cupped it between -1 to 1
 fragColor = vec4(x, y, 0.3, 1.0);
}
sin() oscillates smoothly between -1 and 1, making it one of the most common functions you'll use in shader programming.
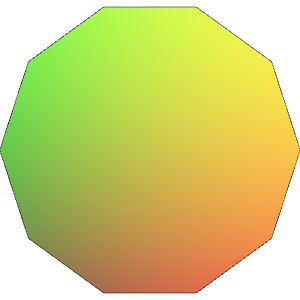
we can change the shape from rect to different shapes p5 support, let's render the shader onto a circle instead of a rectangle.
- rect(-width/2, -height/2, width,height)
+ ellipse (0,0, width, height, 10)
the 10 in the end of ellipse function tell how much points will use the render that ellipse.
Based on the excellent tutorial Intro to Shaders
Comments & reactions
Sign in with GitHub to join the conversation.
Comments load as you reach this section.